You always want tea drinking to bring not only gustatory pleasure, but also aesthetic pleasure. A box of tea bags does not look very nice, especially on festive table. To somehow decorate the serving of tea, tea houses were invented. You can buy them ready-made, or you can make them yourself. You can use plywood or more for the base of the house available material– cardboard. Let's consider making a tea house from thick cardboard.
To make a house you will need materials:
1. Cardboard.
2. Pencil and ruler.
3. Scissors.
4. PVA glue.
5. Acrylic paints.
6. File.
7. Napkins for decoupage.
8. Eggshells.
9. Sponge, brushes.
10. Twine.
11. Varnish.
The process of making a tea house.
1.To make a house, you need to make a sketch and think over the dimensions. We will make the base of the house according to scheme No. 1.
2.According to the calculations performed, we outline the foundation of the house. Then we cut out the parts.

3.To assemble the house body, you need to prepare 3 short strips. Glue the strips to the bases of 3 sides of the house.

4.Then cut out 4 long strips. Using these strips we will fasten the side walls of the house. First, we fasten the 2 sides of the house together.

5. We strengthen one more side of the house. For strong fastening, we use stable elements with which we support the walls during gluing.

6. Carefully place the front wall with the cutout on top of the prepared fasteners and press lightly.

7.To ensure the strength and stability of the structure, additional parts must be cut.

8. We fix the walls of the house from above and below using prepared parts.

9.The walls are fixed to each other, we glue the base of the house.

10. We glue the external joints with masking tape so that in the future the structure does not have cracks or bends.

11. Let's start making the roof. To do this, we use scheme No. 2.

12. We draw out the cardboard according to diagram No. 2. We cut out the elements of the diagram.

13.In order for the roof slopes to be secured to each other, it is necessary to glue the strip in the form of a three-dimensional triangle.

14. We close the voids with small triangles.

15.Fix the roof slopes.

16. We glue the gables on both sides.

17.The body of the house is assembled. Let's start priming. For this white acrylic paint we paint the inside of the base of the house and the roof.


18.Then we prime outer part walls of the house.

19.On the roof we prime only the gables.

20.Next you need to start decorating. Let's start with the foundation of the house first. For this we will use napkins for decoupage. Cut out a design from a napkin suitable size and place it with the colored side on the file.

21.Then carefully pour water onto the napkin.

22.Attach the file with the drawing to the front wall of the house.

23.Press the drawing to the wall.

24.Remove the file from the drawing.

25. Cover the drawing with glue.

26.Glue another pattern to the side walls.

27. Decorate the free space around the drawing with eggshells.


28.Prime the shell.


29. Paint the shell pink.


30.Using a sponge, make impressions with dark paint on the shell.
Do you throw away cardboard because it takes up too much space? But it can become material for your creativity. For example, you can build a cardboard house for children or for pet. Find ideas for such crafts below.
Little house for dolls
Do you have a little daughter? Then make a doll house for her from cardboard with your own hands. Any girl will be delighted with such a present. If you have a lot of free time, then assemble a home for Barbie, and if time is short, then make a small shelter for miniature toys. How to assemble a house? The first step is to draw a pattern. It should consist of three walls, one pediment, a floor, a roof and a partition between floors. Let's start creating. Cut out the details. There are two ways to fasten the workpieces together. One is to glue the cardboard using a hot gun, and the other is to create grooves in the pieces. You can combine two mounting methods for reliability. First connect the walls together, then attach the floor to them. After this, insert a partition between the floors, and last action- this is the roof attachment. You can decorate the front part of the house with cardboard, which will serve as a pediment.
Big doll house

Do you want to make a sustainable structure without spending a lot of time creating the craft? Collect big open house from cardboard. Before starting work, you need to draw a pattern. It will consist of two side walls combined with gables, a rectangle connecting two parts of the future building, and three partitions between floors. We transfer the pattern to cardboard and cut out the details. In accordance with the photo attached above, cuts need to be made in the blanks. They will play the role of grooves. Thanks to this fastening, the structure will stand stably, and if necessary, it will be easy to assemble. Once the grooves are made, you can start cutting out the windows. They can be of any shape and located in any part of the building. To make your home more attractive, frame each window with a curly frame. Use multi-colored gouache mixed with PVA glue for this purpose.
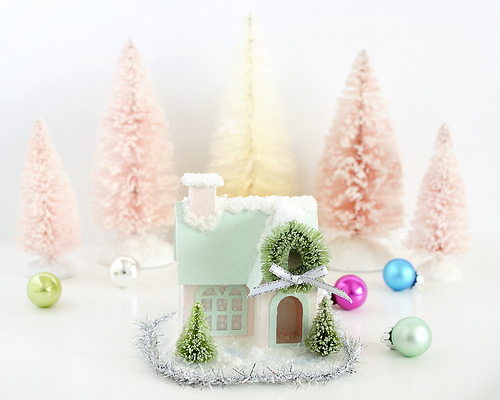
New Year's house

Children love to make such crafts for New Year's holidays. A cardboard house can play the role of a candlestick or become one of decorative details rooms. How to assemble such a craft? You need to start with a sketch. Draw a picture of the house you want to design. If you don’t often do prototyping, then you need to start by making a one-story building of a simple design. The drawing is ready, now you should draw its development. Contrary to popular belief, this is done simply. If your spatial thinking is poor, first make your project out of plasticine. When the pattern is ready, transfer it to cardboard and then cut it out. Glue the pieces together using a hot gun. Paint the craft with gouache or immediately make a model from white cardboard. Complete the project with fir trees and a fence, and then dust the craft artificial snow or small foam.
Tea house

It’s always nice to make not only beautiful, but also utilitarian products. One of them is tea house from cardboard. A master class on making such a product is given above. The roof of this craft is removed and the base is filled with tea bags. Such a house can be placed on a table or used to decorate one of the shelves in the kitchen. How to make a tea house with your own hands from cardboard? Above is a pattern, you need to print it out or redraw it. First, let's assemble the base. It consists of four long rectangles and one small square. We first fasten the walls of the structure together, and then glue the floor. The cutout for the door must be made immediately. At this stage, you need to check whether the bags can be removed from the hole; if necessary, the hole can be enlarged. We cover the base with beautiful paper with a suitable print or paint the house by hand. Now you can assemble the roof. We glue two rectangles together and insert a strip between them. We make gables and make a floor near the roof. You can decorate the part with rectangles curved on both sides. Cover the roof with colored paper or paint the detail.
House for children

Do you want to please your child? Make a cardboard house for your children with your own hands. The best entertainment for kids is to hide in a shelter. The cardboard house will become permanent place games for a child. How to give such a gift to your child? Make a pattern. You can draw it on the wallpaper that remains after the renovation. You need to design the structure with a margin so that your child can enjoy his shelter not just for one season, but for several years. The two side walls need to be combined with the gables. Long walls- these are rectangles. And for the stability of the structure, the roof should be made of rectangles folded into a “P” shape. These large "clips" will cling to the projections that need to be created in the gable. Cut windows in the long walls of the house, and cut out a door in one of the side parts. You can attach it using springs or an old door mechanism.
House for a cat

Do you have pets? Make a cat house out of cardboard. This design will be very primitive, but your pet will be able to appreciate the work. What should an animal's house look like? Take 8 old cardboard boxes. The first row of the structure will consist of four boxes. Connect them together using tape or glue. Cut through holes in a chaotic manner. But don't touch the floor of the house. The second row will consist of three boxes. Arrange them in the form of a corner on the first tier. Make slits in each wall, and also be sure to have several holes that will lead to lower tier. Glue the remaining box with a third layer. Cut passages in it. The house is ready. You can decorate it in any way so that it looks good in your interior.
Packaging house

The holidays are coming soon and you decide to give your friends sweet gifts? Then make a house out of cardboard. Such packaging can be filled with purchased sweets or homemade sweets. How to make a house? Attached above is a template. You need to print the pattern and then cut out the stencil. Take colored cardboard and transfer the drawing onto it. Now cut out the blank and glue it. All that remains is to decorate the craft. You can paint your creation or make an applique from colored paper. If you fill the box with homemade sweets, be sure to wrap them in foil or cellophane. This is necessary so that the product does not become saturated with oil and does not lose its presentable appearance. appearance.
Cardboard tower

It will be easy to create such a craft for those who have extra boxes from the refrigerator and TV. Cut a large box into two parts. The base of the house is ready. Cut windows and a door into the blank. Build two thin rectangles out of cardboard - these will be pillars at the entrance. Now from another rectangle, but bigger size you need to make an arch. We will make the roof of the tower from a TV box. We cut it in half, and then decorate the cut edge with a rectangular zigzag. We create a canopy decorated with the same snake as the roof. You need to place it above the arch. The tower can be decorated with cardboard overlays. Decorate your windows with them. From small rectangles you can create
A dollhouse is a special home in which children's favorites live. You can buy it at a toy store, but you can save money and make a cardboard house with your own hands together with your child. This will be a fun activity that will bring joy to both of you.
What will you need?
Do fairytale house Quite simple for a child. You just have to stock up on imagination and patience. You will also need:
- sharp knife;
- glue;
- scotch;
- scissors;
- watercolor;
- brush;
- colored paper and other finishing materials.
Make it beautiful Dollhouse Drawings and photos will help you.
For a doll
A fairytale house can be made into several floors: for this you will need 2-3 boxes, but you can get by with just one. If there are no solid boxes in the house, use tape to connect several cardboard sheets: Dollhouse it will turn out no worse.
- Take cardboard box. If it is not glued, seal the edges well. It is better to do this with tape, otherwise the fairy house will turn out to be fragile and may fall apart during the game. Cut out the windows.
- Fasten two separate sheets of cardboard at a 45 degree angle. This will be the roof. Place it on top of the box.
- From separate sheets of cardboard, cut out partitions for the rooms that the fairytale house will contain.
- Place them inside the box.
- Now it's time for finishing. It can be arbitrary: from fabric, colored paper, beads, scraps or scraps. You can cover a dollhouse for children with white paper, and then ask the child to color it. He will certainly be happy to take part in this venture!
- Concerning interior decoration, don’t skimp on your imagination here either. After the next renovation, there will always be pieces of wallpaper, fabric, oilcloth left in the apartment. They can also be placed inside and pasted over the dollhouse.
This is what a children's fairy-tale house might look like in the photo.
And this is what the dollhouse looks like from the inside:
Video instruction
Scheme
For babies
Sometimes children don’t want to play with dolls, but rather climb into a small children's playhouse and arrange your space in it. Let's give them this opportunity! Making a children's house with your own hands is also very simple. The only difference will be in size, so you'll have to look big box from under household appliances, for example, a refrigerator or washing machine.
- Glue the sides of the box or connect them with tape.
- Use a utility knife to make holes for the entrance and windows.
- To have more space in the house, you can remove the top of the box and attach it in its place. L-shaped roof. Thanks to this technique, the kids will feel more spacious in the house.
- Now all that remains is to do the finishing. A children's house can be decorated with natural materials: twigs, beams, pine cones, etc. You can simply cover it with paper and paint it.
The ideal fastening for all elements would be tape or a stapler. Glue is an unreliable material: a children's house can break during play.
This is what the children's house looks like in the photo. Agree, the craft scheme is very simple and is unlikely to complicate loving parents.
Wood
For the New Year
The New Year's house for children will be different only external finishing. The craft pattern will be the same. To give the product a fabulous, New Year's look, cover it with glitter, cotton wool, and attach paper snowflakes.
You can put a small artificial Christmas tree inside and decorate it, and Father Frost and the Snow Maiden or a snowman can live in this house.
This is how a New Year's house for children will look in the photo.
A house made of cardboard is original and interesting, and most importantly, stylish for unusual interior.
A house made of cardboard with your own hands can play certain functions, for example, be a real home for an animal - a cat, a dog, and sometimes even other pets.
In addition, you can make a house for a baby - children love to play where they can hide, be alone with toys, and most importantly, feel like the real and only owner.
Decorative cardboard house
In order to decorate your apartment with cute houses that can imitate settlements, it is enough to stock up on the following materials:
- cardboard different colors. You can buy a pack of plain cardboard, and then simply paint it in different colors;
- paints. Even if you decide to buy colorful sheets cardboard and paints will definitely come in handy. You can take watercolors, they are found in almost every home, at least where there are children;
- scissors;
- colored paper, you can also use cardboard;
- glue.
How to make a cardboard house

The actions will be as follows:
- First, we take paper and make a box out of it for a cardboard house. It is better if the house is small, since you will need to make several of these. When cutting out a pattern for a future craft, it is better to pay Special attention on the recesses, which will be smeared with glue to fix the walls to each other;
- We remove the top of the box, which will serve as the base for the cardboard house, and install a roof in its place. It also needs to be attached to the recesses so that the product does not fall apart. If you plan to decorate the house with something else, you can make fastenings using a stapler, but glue will look better and will not allow the cardboard to delaminate and create gaps;
- You need to install a cardboard house with your own hands on a base of prepared paper. It should be dense so that it does not wrinkle quickly. Depending on how many houses you will have, you need to take a sheet of paper. You can select one large one, or you can stop at cut small ones. We glue the house to the base;
- we make all the other houses, after which we attach them to the base material. The colors of the houses should be arranged in the same way as the lamps of the garland (for example, if the first lamp is blue, and then red and yellow, we place the houses in the same way). However, it is important to remember that garlands most often contain lamps that fit too tightly together, so this rule may not be relevant;
- in each house, depending on the size of the lamps and cord, we make holes (if there is a large hole punch, this will become the best option);
- we thread the garland into each of the holes through the houses.
That's all, now you can install the houses made from cardboard in a semicircular row and plug the garland into a power outlet.

There will be a very beautiful glow inside. Of course, the number of windows and doors in such houses may vary, but it is better to make them multi-window - the glow effect will be enhanced.
Is there enough space? Of course that's enough!

And if you take, say, a box from a refrigerator, TV and microwave, the price will not be that of such a cardboard house for a child.
So, it will be possible to use the highest box to create a kind of tower, in which it will be cut out using stationery knife passage into the TV box.

The baby will be given a lot of space, and most importantly, he will feel as if he is in a whole castle. A microwave box is suitable for creating a roof. What did you think?
The top of the TV box needs to be removed and an L-shaped roof installed in its place. And the height of the “ceilings” will be higher, and there will be more space, and the view will be more original.

By the way, finishing the roof of a cardboard house can be done using natural material, what are they suitable for? But the walls can be covered with small branches - such a house will take on the appearance of a timber structure, or some kind of toy forest structure.
It is better to fasten all the elements using a large stapler, since glue does not always help in the construction of such serious structures that are actively used by children, and, as you know, children rarely remember that their “toy” can break.

Inner part It is better to either decorate the house or paste it with posters, pictures, stickers. And they will look great where doors and windows are decorated.
A large and impressive craft, but what can’t you do for your beloved children!
Materials:
- cardboard,
- glue “Moment crystal”,
- acrylic paints,
- acrylic lacquer,
- padding polyester,
- pieces of fabric,
- braid,
- beads,
- wooden sticks,
- tassels,
- modeling mass,
- scissors,
- wire,
- beads,
- mirror,
- bead pendants,
- pieces of wallpaper,
- pencil,
- ruler,
- disposable containers,
- fantasy.
Operating procedure:
It so happened that one of my daughters fell ill with chickenpox, and I needed to keep them occupied with something at home. We decided to make everything together house for our dolls. They made it according to the principle: I made it out of what I had. We didn’t have a ready-made box, but we did have a fairly large piece of cardboard and many small pieces of various thicknesses and textures. I thought that our house would be a small one consisting of two rooms, but that was not the case: 2 young designers had their own thoughts about our house.
As a result, we began to do dollhouse 3 floors with 5 rooms(later the upper floor was divided into 2 parts and there were 6 rooms).
Layout
From big piece I cut out 1 piece of cardboard - this is the back wall of our house and 2 side ones (see photo 1).

Next, I bent down 2 side walls and began gluing the floor and ceiling (photo 2).

The house has dimensions: height - 74 cm, width - 50 cm, depth - 30 cm.
I covered the blank for our house with pieces of wallpaper and suitable paper (see photo 3).

The outside of the house is covered with wallpaper, the roof is strips of cardboard measuring 3 cm by 31 cm, glued overlapping.
The frames are glued together from strips of cardboard.

Our house needed a variety of puppet, which we tried to make with our own hands from scrap materials. I glued everything by eye without preliminary drawings or patterns. I simply cut a cardboard rectangle and glued the necessary pieces to it. All furniture is painted with acrylic paint and covered acrylic varnish.
Bedroom
So, room No. 1 - bedroom. There is a lot of furniture in it, and the first thing we’ll start with is this. It is quite easy to glue it together, just look at photo 4.

I covered the cardboard blank with acrylic paint, after the paint had dried, varnished it, glued a soft mattress, added a few soft pillows and a blanket.
The next pieces of furniture are a chest of drawers and a bedside table (photos 5 and 6).


The principle of their manufacture is the same - a small cardboard box to which false drawers are glued. There was also a place in the bedroom for a comfortable rocking chair (photo 7).

A large and spacious closet also found its place (photo 8).
 In photo 9 the whole room is in color.

You can also watch how to make a bed for dolls (and other furniture) on the “Homemade” channel:
common room
Room number 2 - common room to watch TV. The TV in our house is flat - a large cardboard rectangle was covered with black acrylic paint, after drying, a suitable picture was glued and the whole thing was covered with acrylic varnish.
The main place in this room is occupied by a spacious one, which houses a large family of dolls.
The base of the sofa is a cardboard blank (photo 10).

The back and armrests are covered with paint and varnish, and the base is glued with padding polyester and fabric. My daughters already had a table - it was a wooden construction set, onto which we glued a piece of cardboard and painted it all together.
We see room No. 2 in photo 11.

Video on how to make a cabinet:
On the second floor of our house there is a music room and a kitchen.
Living room
IN music room there is a fireplace (photo 12).

It, unlike all our furniture, is covered with cracks. At the beginning it was covered with white acrylic paint. After it dries, a layer of craquelure medium is applied. After this layer has dried, a layer of black acrylic paint is applied. After drying, the entire product is coated with matte acrylic varnish.
Since our living room is musical, then from 6 matchboxes the piano was glued together (photo 13). It was immediately covered with colored paper, but the paper turned out to be of poor quality, and later it was painted, like all the furniture in the house. In addition, I glued 2 square beads to it - these are pedals.

The piano stool (photo 14) is glued together from cardboard, painted and decorated with a velvet cushion.

Sofa (photo 15) and armchair (photo 16). I glued them together from cardboard and decided not to cover them with fabric, but simply paint them with paint; my daughters were happy to help me with this. After applying varnish, they are very similar to leather.


The entire music room after painting the furniture (photo 17).

Kitchen
Room No. 4 is the kitchen, it is small but roomy. Kitchen set- this is a large cabinet in the shape of the letter L (photo 18).

The sink is a small plastic jam container, the faucet is made from modeling clay, and there is a small hanging cabinet:

The stove is electric with 4 burners (photo 20), its door opens.

In the kitchen we have 2 chairs (photo 21) and a table (photo 22).


Dishes were also made from small items (photo 23).

Photo 24 shows our kitchen after applying paint and varnish.

On the top floor we accommodated children's and toilet room.
Children's room
IN children's The main place is occupied by a bunk bed (photo 25).

She has soft mattresses and pillows. In the room there is a small table (photo 26) and a chair (photo 27).


There is also a cabinet for toys (photo 28).

In this room I did not cut a window, but simply glued a cardboard one to the side wall. The room is decorated with a colorful alphabet (cut from paper packaging from a children's toy). Photo 29 shows a children's room in color.

Almost all the chandeliers in our house are glued together from disposable containers, beads, cockerel sticks and braid.
Only one, which is in the music room, is made of beads, wire and bead fittings.
I also glued a ladder to the house, but we have it attached for now, because I am afraid that if it is glued, it will interfere with two children playing at the same time.
Bathroom and toilet
For toilet room we needed a toilet, sink and bathtub. They needed to be made quickly and easily.
And I decided to just sculpt them from modeling material. Which is what we subsequently did with our daughters (photo 30).

They may not be ideal, but they were made together.
Our works took about a day to dry. Next, we painted them with white acrylic paint and coated them with glossy acrylic varnish. After drying, the tank turned out to be quite heavy, then I replaced it with a lighter one (cut it out of cork and painted it). To keep the sink stable on the wall, I glued a nightstand underneath it. The bedside table was painted like all the furniture in the house. Next, I glued the bedside table to the wall and floor of the house, and then glued the sink. A tap (made from modeling clay) and beads are glued to the sink. There was no ready-made mirror, and ours is also made of cardboard.
The toilet is made of several parts - the base, cockerel sticks, a tank (made of cork), chains and beads.
This entire structure is complemented by a seat - cut out of cardboard and covered with plain fabric.
In photo 32 the entire toilet room is in color.

So quickly and cheerfully, together with our daughters, we built from scrap materials our dollhouse. Such crafts always bring joy to children.
It may be quite simple for now, but my daughters are quite happy with it and enjoy playing together.
And another video on how to make a house for dolls with your own hands from plywood:
Did you like the product and want to order the same from the author? Write to us.
More interesting:
See also:
How to make doll furniture
Do-it-yourself doll furniture Surely, your daughter has repeatedly asked that her favorite doll have...
Furniture for dolls. Double bed. Master Class
As you have already noticed, Irina Ma’s doll world is not much different from the human one. After all, they have everything...
The sheep is a symbol of the New Year 2015
In anticipation of the coming year of Sheep Chinese horoscope a wonderful gift or addition to...
Fabric snail
The master class was completed by: Serdinova Irina Sergeevna. A gift for your beloved sister on March 8th. Easy to...
DIY doll house
And another master class on how to make a doll house with your own hands was prepared by Tatyana Stepanova. "I...
Snowman Olaf from the movie "Frozen"
Snowman Olaf Master class on making the fairy-tale character Olaf the snowman with your own hands...
Textile interior doll. Master Class
Each needlewoman, making another interior doll, invests her love and tenderness. By...


